
This guide will show you how to manually change a WordPress URL by using phpMyAdmin & cPanel to update your domain or WordPress installation path.
Sometimes it may be necessary to manually change the URL for your WordPress site directly in the database. For example, if you have the main domain on your cPanel account changed to a different domain & have a WordPress website installed, the domain name would be changed on the cPanel account but not in the database.
The first thing to do is locate the wp-config.php file in order to determine what the database name is that is being used for the WordPress site in question. To do this, navigate to the File Manager in cPanel as shown below.
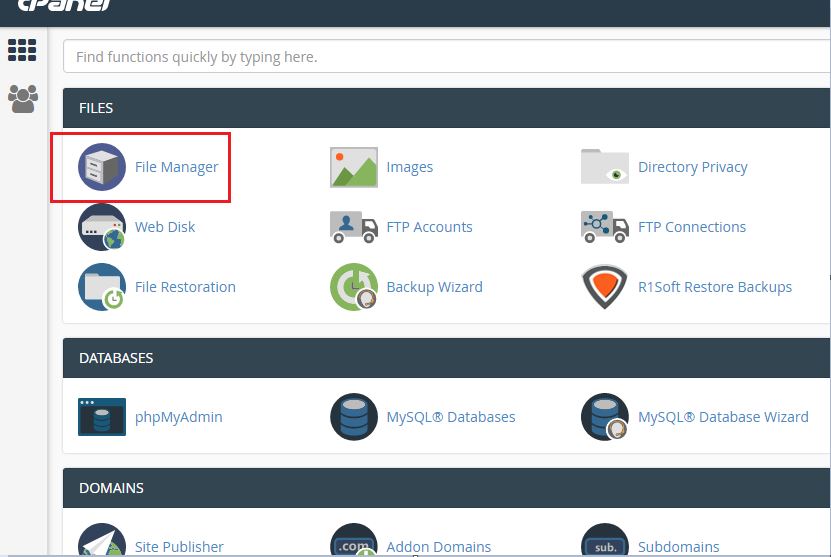
cpanel-main-menu-file-manager
By default, the file manager should open in the “home” directory. Double-click in order to navigate into the public_html directory, which is where your publicly accessible files would be located.

cpanel-file-manager
Once you’ve entered into the public_html directory, you should see your WordPress files. Note, if you have WordPress installed in another directory such as “wp” or “blog” etc, you will need to navigate into that folder.
Locate the “wp-config.php” file. Now, right click on the file & click “view”.
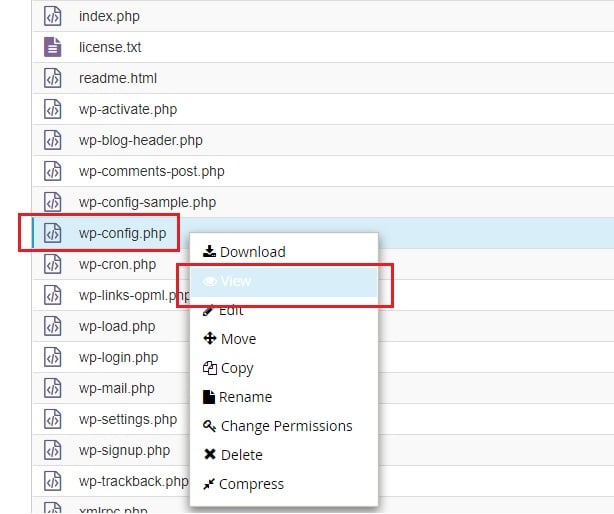
cpanel-file-manager-right-click
After clicking “view” as shown above, the wp-config.php file should be opened in another tab in your browser. From here scroll down to the section titled “The name of the database for WordPress”.

wp-config.php
As shown above, we now know that the database name is “veerotechdemo_w209” – this entry will be different for yours, but the format will be similar.
The next step is to locate the database in phpMyAdmin via cPanel. Navigate back to cPanel & locate the icon for phpMyAdmin.
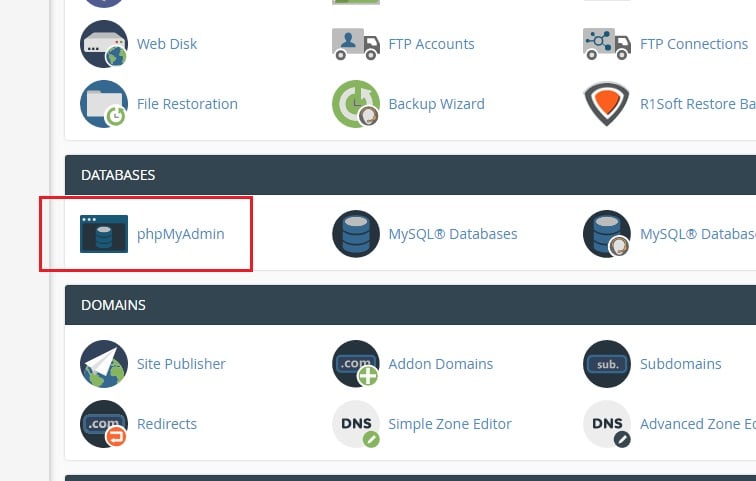
cpanel-main-menu-phpmyadmin
After clicking the phpMyAdmin icon, this will open phpMyAdmin in another tab in your browser. From here, you’ll need to locate the database name that we previously identified from viewing the wp-config.php file. If you have multiple databases, you’ll need to be sure you’re choosing the one specifically noted in the wp-config.php file in the previous steps in this guide. You’ll then want to click the + symbol to expand the tables.
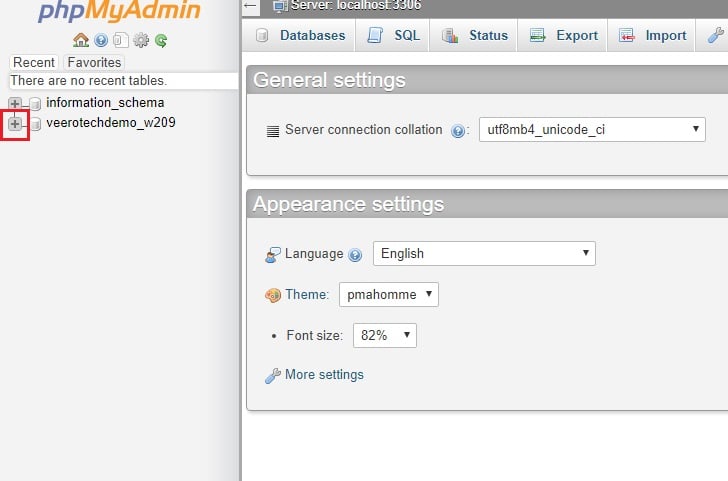
phpmyadmin-main-menu
After clicking the + symbol to expand the tables for the database, locate the wp_options table. Note – the first prefix for your database may not be wp_ so be sure to look for the second half of the prefix which would be _options
Once you have located the _options table, click the table to show the entries. Look for two entries that you’ll need to modify.
– option_name: siteurl
– option_name: home

phpmyadmin-browse
Once you have located the URL entries to change click the edit option on the left for each entry to enter your new domain. When entering your new URL into the field, be sure to still include the http:// or https:// portion for your domain. Once you’ve entered the new domain in the proper format, click Go at the bottom.
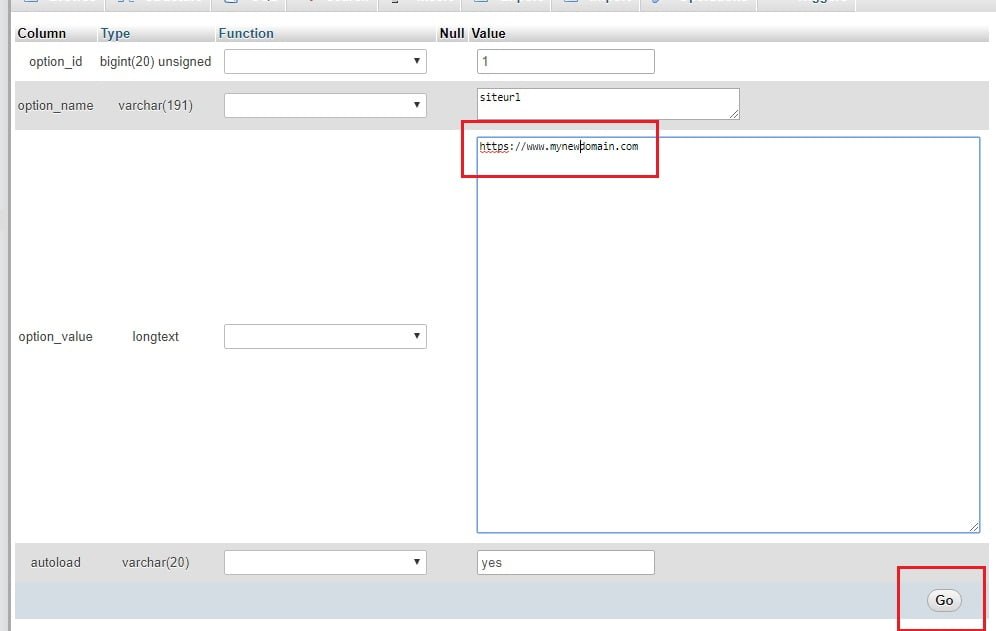
phpmyadmin-edit
After clicking Go to save the changes, you’ll be taken back to the previous page where you can do the same for the second entry, the home URL. For this one, follow the same steps as above to ensure both entries listed match. You’ll see in the screenshot below that both of our entries match for the siteurl and home entry.
Note: This is important because if these do not match, the site will not load properly.

phpmyadmin-files
After you have changed both URL’s to the new URL you would like to use (must be associated with the hosting account), your site should now load properly. You may need to clear any caching plugins or browser caches as well. Should you have any issues or questions, feel free to reach out to our support department.
adopted from https://www.veerotech.net/kb/change-wordpress-url-using-phpmyadmin/